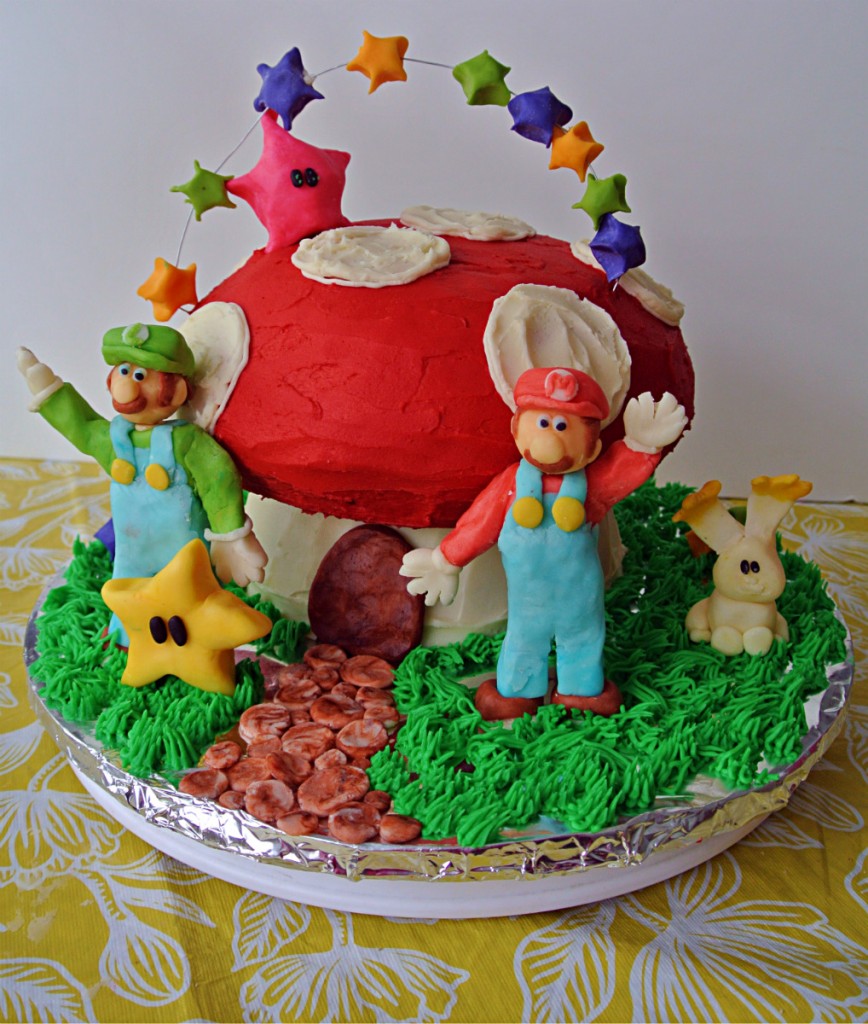
This week we celebrated a very special day- our daughter Grace's 5th birthday! I try to make a unique cake for each of my children's birthdays as part of their celebration. Grace has been planning her cake for the last year, and settled on a Super Mario Galaxy Cake many months ago. For a long time I couldn't decide on a design, or how to construct the cake. I knew I wanted to have characters on the cake, but piping butter cream is definitely not my forte. So, I decided to try using modeling chocolate! Here is a step-by-step walk through on how I made this (might I say) adorable cake.
Step 1- Baking the cakes
Grace wanted the cake to be in a mushroom shape. I used Alton Brown's Devils Food recipe (check out Eric's review of that recipe) for the batter, but added some mini chocolate chips in for extra moistness. I baked one batch in a large pyrex bowl for the top of the mushroom, and the second batch of batter in a more flat-sided pyrex storage container. This gave me exactly the shapes I needed without having to do too much carving. I had enough extra batter to make 6 cupcakes too. Tip: make sure to grease and flour your baking vessel! It is the only way you can ensure that the cake will come out clean. Baking time will be increased significantly when baking in a bowl. It is deeper and takes longer to set. I didn't keep track (sorry!) but I am guessing I baked the large one for about an hour, and the smaller one for 50 minutes. Once the cakes were baked, I allowed them to cool for about 20 minutes in the bowls, and then turned them out, wrapped them in cellophane, and popped them into the freezer to firm up.
Step 2- Modeling Chocolate
Since a Mario cake is NOTHING without Mario and Luigi, I decided to take a little risk and try out some modeling chocolate.
I found these two videos on youtube that gave me some hope that I could do this on my own!
One is "how to" and one is "how not to" by the same person. It is such a simple process- I was shocked at how easy it looked. TIP: I didn't leave it overnight to set, I left it for about 15min, and it was perfectly set up and ready to use. I also used wax paper instead of saran wrap, and it worked perfectly.
To make modeling chocolate you melt your chips in the microwave until just melted in 30 second increments. Once completely melted, allow the chocolate to cool to room temp (but still liquid). Then corn syrup is added to the melted chocolate to cause it to sieze up. I had 12oz of white chocolate chips to work with, so I used ⅓c of corn syrup. TIP: Don't over mix the chocolate once the corn syrup is added. Allow it to just come together into a big lump, then turn it onto some wax paper and wrap it up. Allow it to cool and firm up a bit.
Once your chocolate is firmed up, it is very easy to break off pieces and work them in your hands until pliable and soft. Color can be added at this time too. I recommend using gel paste food colors for this step, but I had good success using regular food coloring too. You can't get as vibrant of a color with the regular colors because they will cause the chocolate to become too soft to work with, but it can work.
Working with modeling chocolate is very similar to using fimo clay or even play dough. It is pliable and can be blended and smoothed. This part was so much fun! Make sure you work on a piece of wax paper so that it doesn't stain your table. I enjoyed sculpting the faces and bodies, and making all of the other characters in the game that my daughter loves. I love how they all turned out. TIP: if your pieces start to get too soft let them sit on the wax paper for a few minutes and harden up. Once you are completely done with your pieces, allow them to fully firm up for 10min or so and they will be very sturdy, and they also taste great. I also made a door and some stones out of the scraps of chocolate.
Step 3- Frosting the cake
I decided to use butter cream frosting for the cake, because I just don't have enough experience with fondant, and I didn't have the materials I needed to make it that day. Butter cream is very forgiving, and can be smoothed out pretty well with the right tools. I make a very simple butter cream, and I have never had any issues with it. I use 1lb of softened butter, and whip it in the mixer until light and fluffy. At this point I add vanilla or other flavors. Then a start adding powdered sugar ½c at a time until I reach the consistency I like. Make sure not to get it too stiff or it will be difficult to pipe or spread. If it does get too stiff you can add a teaspoon of milk or cream to loosen it up. I added red gel food coloring to get the dark red color I need for this cake, and kept some to keep white, and some to make the green for grass. I used a total of 2lb of butter!!
When frosting a cake, it is important to crumb coat your cake first. Crumb coating means putting a thin layer of frosting on the cake surface to catch all of the crumbs so they don't show up on the final layer of cake. I crumb coated both of my pieces of cake and put them back into the fridge for 30 minutes. Then I brought them out and frosted them again. I put the top of the mushroom onto a small circle of cardboard to support its own weight when stacked, and then stacked the cakes together. At this point the cake is really coming together!
Step 4- Assembly
I assembled the cake on a round pizza stone covered with foil. I then put the different characters on the circle where I wanted them to go. I wanted some of the stars to appear like they were flying, so I strung them onto some craft wire and shaped the wire into a rainbow shape. Once everything was placed I used a grass tip and some green butter cream to make the grass all over the base. Using a grass tip is also a great way to cover up mistakes! The bottom edge of the mushroom was a little jagged, but the grass all around it made all of the imperfections disappear! I also piped some white frosting to make the spots on the mushroom cap. Now the cake is done, and of course, Grace loved it. It makes me feel really proud to make something that brings her so much joy, and tastes SO delicious!


Michelle Wahl
This is so amazing!!!
cakewhiz
your cake is beautiful! you must have put so much time and effort into making this and i think you did a fantastic job 🙂